

How to Analyze an Image: Provenance & Authenticity Guide

Start with a quick AI detector, then validate its result manually against the image's pixels, metadata, lighting, and provenance. Reliable analysis combines first-order statistics, a signal at least three times stronger than noise, and benchmark checks against ground truth, not a single verdict.
You may be checking a screenshot shared by a source, a photograph attached to a breaking-news post, or an image submitted for publication. It looks plausible at first glance, yet plausibility isn't proof. The safest approach is layered: use automation to identify suspicious images quickly, then investigate the cases where the tool is uncertain or the consequences of a mistake are serious.
Why Surface-Level Inspection Fails Every Time
A viral image can survive a casual inspection because it satisfies the visual expectations people already have. The light appears natural, the scene has believable detail, and the people seem to occupy the space correctly. A hurried editor may approve it before asking the more important question: what evidence connects this file to the event it claims to show?
Older visual checks still have value, but they no longer settle the matter. Obvious pixelation, strange fingers, warped text, and inconsistent reflections can expose some synthetic images. They won't reliably expose a carefully generated image, a photograph that has been selectively edited, or a file that has been resized and recompressed during online distribution.

The image is evidence, not the whole story
A fact-checker shouldn't assess only whether an image looks photographic. Check the surrounding claim, the account that posted it, the earliest available version, and whether independent material places the scene in the stated location and time. A genuine photograph can be paired with a false caption, while an AI-generated image can be presented without any clear indication that it is fictional.
Modern image analysis grew from the digitization milestone associated with the Quantimet 720 in 1969, followed by cheaper digital storage and software-based systems in later decades. That history matters because analysts can now examine measurable properties such as intensity, shape, texture, and pixel distributions instead of relying exclusively on visual instinct. The history of digital image analysis describes this shift from manual inspection toward computable evidence.
Practical rule: If a claim matters, never let “it looks real” become the final verification step.
The strongest workflow accepts that human judgment and automated detection fail in different ways. A detector may notice statistical irregularities that a person misses, while a human may recognize a misleading crop, an impossible location, or a caption that the detector cannot evaluate. Their disagreement is not an inconvenience. It is often the signal that deserves the closest examination.
Starting with AI Image Detection Tools
Use an AI detector as a triage filter, not as a court ruling. It can process visual patterns at a scale that makes it useful for an editor reviewing a busy submission queue, but the result still depends on the file you provide and the type of image being assessed.

A practical first pass
Preserve the original file. Save the attachment or download before editing, cropping, or converting it. Keep a separate working copy for inspection.
Upload the file to a detector. AI Image Detector accepts JPEG, PNG, WebP, and HEIC files up to 10MB, according to the publisher's product information. If the image came from a social platform, remember that compression may have removed useful evidence.
Read the verdict and the explanation. Look for the direction of the result, the confidence level, and the visual indicators describing the patterns that influenced it. A verdict such as Likely Human or Likely AI-Generated should tell you where to investigate next, not replace that investigation.
Record the result. Note the filename, source, upload date, verdict, and any explanation. This creates an audit trail and prevents a later discussion from relying on memory.
For teams comparing computer-vision providers or experimenting with multimodal systems, a resource on replacing Clarifai for VLA models can help frame the wider tooling decision. That is a separate engineering question from verifying one image, but the same principle applies: understand what a system evaluates before treating its output as evidence.
A detector is most useful when it narrows the queue. It can flag a file for closer review, support a human decision, or provide an additional signal beside provenance and reverse-search work. It can't establish what happened in the physical world, and it can't determine whether a real photograph has been assigned a false context.
For a deeper walkthrough of the first-pass process, see this guide to the AI Image Detector tool.
A short demonstration can make the interface and review sequence easier to follow:
If the image is important enough to publish, litigate, teach from, or use in a safety decision, move beyond the first pass even when the result appears clear.
Understanding Confidence Scores and Their Limits
A confidence score expresses how strongly a detector's learned pattern matches one category. It doesn't mean the system has proved authorship, identified the exact generator, or reconstructed the image's complete editing history. Treat it as a probability-like signal that changes how much scrutiny the file deserves.
The score can become misleading when the image is a hybrid. A human photograph may contain AI-based enhancement, a synthetic background, or a small generated object. Conversely, an AI image may have been cropped, sharpened, resized, or compressed until the patterns used by a detector become less distinct.
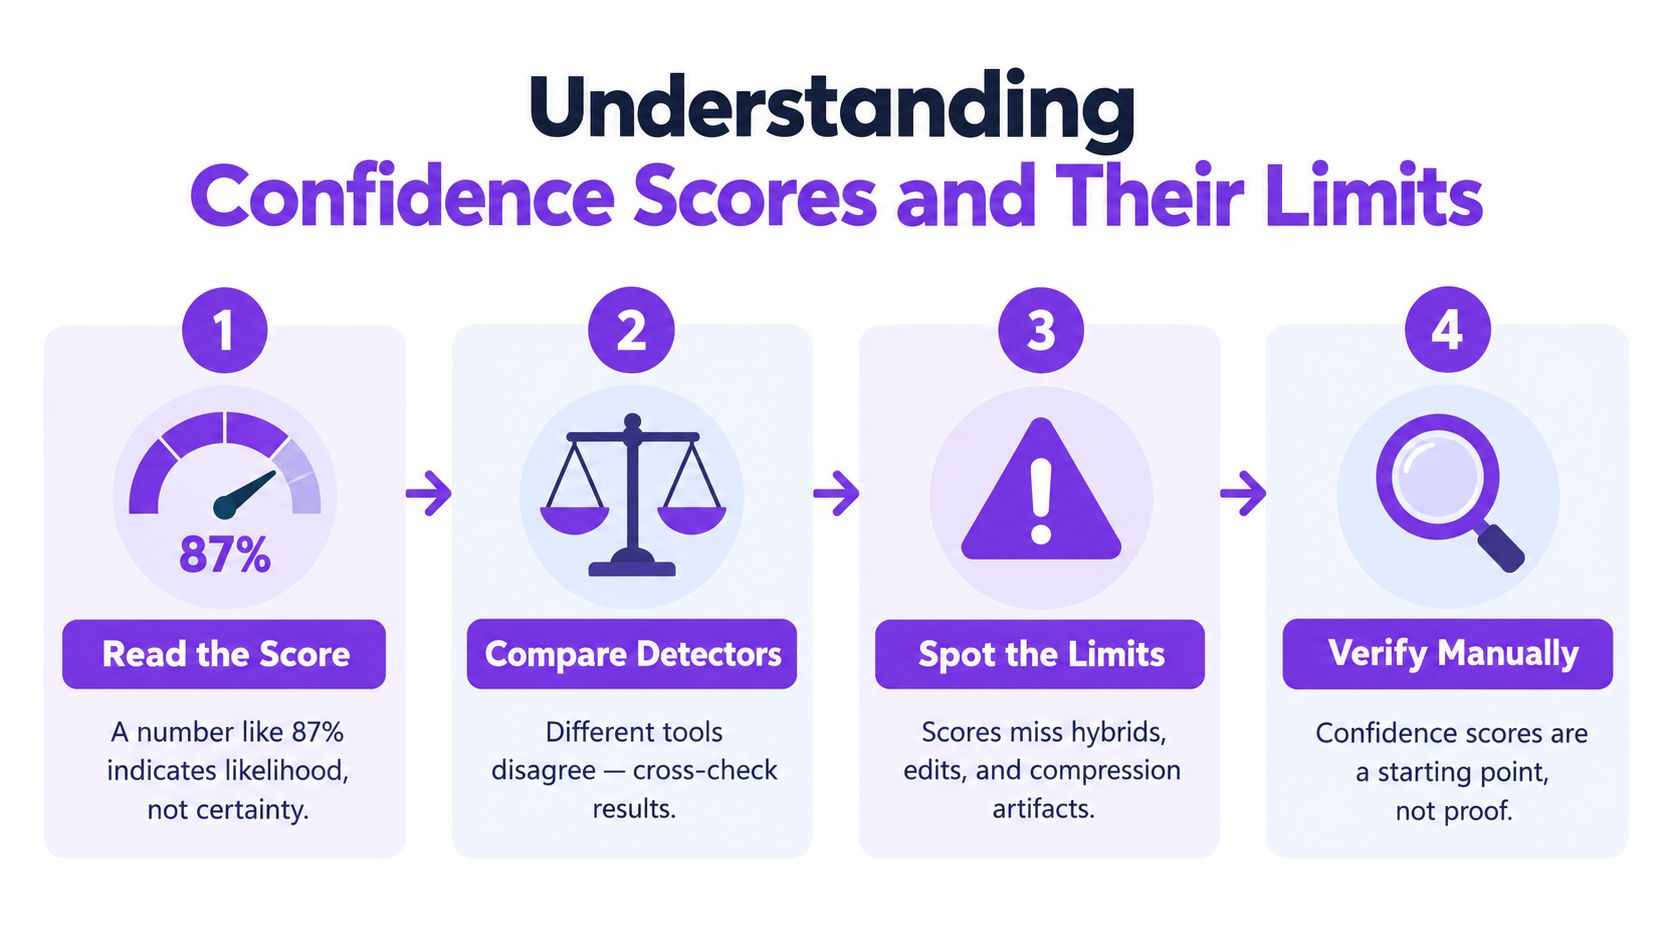
Four questions to ask before acting
- What did the system assess? It assessed the submitted pixels, not the caption, account history, location, or event.
- Could editing explain the result? Heavy retouching, artistic rendering, and aggressive compression can produce patterns that resemble synthesis.
- Does another method agree? Agreement between independent checks is more useful than confidence in one interface.
- What happens if the decision is wrong? A low-stakes moderation decision and a serious allegation require different thresholds for escalation.
The first-order statistics used in digital image analysis include measures such as mean, variance, skewness, median, standard deviation, covariance, and correlation. These summarize brightness distributions and can help analysts study texture and structure, but they don't automatically reveal intent or cause. The Oxford teaching material on image statistics also emphasizes the importance of sampling, optics, and noise. A practical rule from that material is that meaningful signal should be at least three times the noise level, which explains why a weak or heavily processed file deserves caution.
Read more about the difference between a model's output and a definitive finding in this explanation of probability versus certainty.
A high score should accelerate verification, not end it. An ambiguous score should slow publication, not invite a guess.
When detectors disagree, preserve both results and inspect the disagreement. Differences may reflect the image's editing history, a crop that contains mostly ordinary photographic content, or a detector limitation. The correct response isn't to select the answer you prefer. It is to find independent evidence that can explain why the tools diverged.
Manual Visual Forensics Techniques
Manual forensics works best when it is targeted. Don't stare at the whole image hoping authenticity will reveal itself. Form a question, enlarge the relevant area, and compare what should be consistent across the frame.
Start with the file, then inspect the scene
Check available EXIF metadata for the capture time, camera or phone details, orientation, and editing-software entries. Metadata can be stripped, rewritten, or lost during export, so its presence supports a provenance claim but its absence doesn't prove fabrication. Compare the file's metadata with the sender's account of how it was captured.
Next, inspect the image at high magnification:
- Light and shadow: Identify the apparent light sources and follow their direction across faces, objects, and ground surfaces. A shadow that points differently from nearby shadows is a useful lead, not automatic proof.
- Anatomy and objects: Examine hands, ears, teeth, glasses, jewelry, buttons, and repeated fine details. Look for geometry that changes between adjacent areas or objects that merge into one another.
- Edges: Zoom around hair, fences, text, windows, and object boundaries. Soft halos, abrupt sharpness changes, and mismatched compression can indicate compositing or local editing.
- Texture: Look for repeated foliage, fabric, skin, or background patterns. Repetition may result from generation, cloning, or ordinary image processing, so compare the pattern with the scene's perspective and lighting.
- Perspective: Trace lines that should remain parallel, such as building edges, road markings, shelves, or window frames. Check whether scale and occlusion make sense as objects recede.
Separate observation from interpretation
Write “the left window frame bends near the person's shoulder” before writing “the image is fake.” That discipline matters in newsrooms because colleagues need to reproduce the observation and challenge the interpretation. It also prevents a memorable artifact from overwhelming stronger evidence elsewhere.
Quantitative analysis can support the visual review. Histogram inspection, region-level measurements, filtering, segmentation, and pattern recognition are established parts of image analysis, and they turn visual impressions into values that can be compared. The benchmarking guidance from the Broad Bioimage Benchmark Collection shows why a reference standard matters: algorithmic results should be compared with expert-annotated ground truth using explicit error measures, including object counts and boundary precision.
Use a dedicated workflow for detecting edited images, but don't confuse editing with deception. Cropping for layout, color correction, dust removal, and accessibility adjustments may be legitimate. The question is whether the change alters the meaning of the image or conceals relevant evidence.
When to Trust Automation vs When to Dig Deeper
The right level of analysis depends on risk, ambiguity, and complexity. Automation is efficient when you need to sort many routine submissions. Manual work is slower, but it becomes necessary when the image may affect a person's reputation, a public claim, a legal decision, or a safety response.
| Situation | First action | Escalate when |
|---|---|---|
| Low-stakes social post | Run an AI detector and inspect the caption | The image supports a consequential claim |
| Routine moderation queue | Use automated screening to prioritize review | The file is ambiguous, edited, or repeatedly disputed |
| News image near publication | Preserve the original and check provenance | The source cannot establish capture context |
| Investigative or legal material | Document the file and use independent checks | Any material inconsistency remains unresolved |
| Academic or professional submission | Compare the image with the stated method and source | The image contains unexplained synthetic or composited elements |
A detector is a good fit when the image is simple, the decision is reversible, and the result is clear enough to prioritize action. It is a poor substitute for investigation when the file has passed through several editing systems or when only a small region may be synthetic.
The disagreement rule
If a detector says Likely AI-Generated and the image contains obvious visual contradictions, manual review may confirm the concern quickly. If the detector says Likely Human but the metadata, lighting, or source history conflicts with the claim, trust the conflict, not the reassuring label.
Research on image-analysis benchmarks recommends testing systems against variation such as lower signal-to-noise ratio, out-of-focus capture, changing density, and weak visual differences. A separate benchmark found that preprocessing, filtering, segmentation, interpretation, and quantification can fail independently, which is why the robustness research on image-analysis pipelines supports stage-by-stage testing rather than reliance on one overall accuracy impression.
For journalism, provenance deserves special attention. Capture credentials and signed metadata can strengthen a chain of custody, but they still need to be understood in context, including what they certify and what they don't. Apple's discussion of a verified photography reference image illustrates the broader distinction between an image that looks authentic and a record designed to attest to capture and processing history.
Building Your Image Verification Workflow
A reliable workflow should produce the same kind of record whether you're checking one file or managing a large queue. Start by preserving the original, then assign the image a filename or case identifier that won't change as it moves between people and systems.
A tiered process
Capture the context. Save the image, post, sender details, caption, and the date you received it. Record where you found it without treating the first visible upload as the original.
Run a quick screen. Use an AI detector and save the verdict, confidence signal, and explanation. Don't crop before this pass unless you also preserve the unmodified file.
Check the file history. Inspect metadata, dimensions, format, export clues, and any available provenance information. Missing metadata is a limitation to record, not a conclusion.
Target the anomalies. Review hands, faces, text, reflections, edges, shadows, repeated textures, and perspective. Focus on regions that either support or contradict the detector's result.
Test the claim externally. Search for earlier versions, related photographs, matching landmarks, weather or event records, and independent eyewitness material. An image can be genuine while its stated context is false.
Assign a decision with reasons. Use categories such as verified, probably authentic, unresolved, probably synthetic, or misleading context. State what evidence supports the category and what remains unknown.
Keep a compact log with the original filename, working-copy name, detector output, metadata observations, visual findings, source trail, and reviewer. For newsroom accountability, that record is often more valuable than a screenshot of a score because another editor can follow the reasoning.
Documentation rule: Record uncertainty explicitly. “Unresolved because the original file and capture context are unavailable” is a defensible finding.
Don't automate every stage just because you can. Batch screening saves time, but automatic resizing or format conversion can destroy the very clues a later reviewer needs. Keep originals read-only, standardize the order of checks, and escalate only the cases that meet your risk criteria.
Next Steps for Developing Your Skills
Accuracy improves when you practice on images with known histories. Build a private library containing confirmed photographs, openly synthetic images, edited photographs, screenshots, crops, and files that have been recompressed. Label why each image belongs in its category, then test yourself before looking at the answer.
Build repeatable habits
- Compare before guessing: Ask what should be true if the image is genuine. Check that expectation against shadows, perspective, metadata, and context.
- Train with disagreement: When a detector and your visual assessment differ, write both positions down before seeking more evidence. Disagreement teaches you where your assumptions are weak.
- Study failure modes: Keep examples of false alarms caused by artwork, heavy retouching, compression, or unusual texture. Also preserve examples where a convincing image concealed a local edit.
- Review model changes: Detection systems evolve as image-generation systems change. Re-test your reference library when a tool changes its interface, model, or explanation style.
- Keep a verification journal: Record the initial judgment, final decision, evidence that changed your mind, and the clue you missed. That turns isolated checks into accumulated expertise.
Learn the technical basics behind acquisition, filtering, segmentation, measurement, pattern recognition, and spatial statistics. Those methods help you move from “this area feels wrong” to a testable observation about intensity, boundaries, texture, or distribution. Just as important, learn the ethical boundary: don't expose private personal data unnecessarily, don't publish an unverified accusation, and don't treat a detector score as proof of wrongdoing.
For ongoing work, combine a detector with metadata inspection, reverse-image research, image editing software, and a written review protocol. No tool will remove uncertainty from every file. A disciplined process makes that uncertainty visible, limits overclaiming, and gives editors a clear reason to publish, hold, or reject an image.
AI Image Detector analyzes uploaded images for patterns associated with AI generation and returns a confidence signal with an explanatory verdict, which makes it useful for the first screening stage of this workflow. Visit AI Image Detector to run a file through that initial check before you begin deeper forensic validation.