
How to Find Metadata on Photo Files A Guide for Every Device
Ever wonder what story a photo is really telling? Beyond what you see, every digital picture carries a hidden narrative tucked away inside the file. This information, called metadata, is the photo's digital fingerprint.
Think of it as the who, what, where, when, and how behind the image. It’s a goldmine of context that the picture alone can't provide, automatically generated by your camera or smartphone the moment you press the shutter. For anyone looking to organize their photo library, verify an image's authenticity, or just geek out on photography settings, this data is invaluable.
The good news? You don't need special software to find it. On a Windows PC, just right-click the image file, select "Properties," and head to the "Details" tab. If you're on a Mac, right-click the file and choose "Get Info." You can also open the image in Preview, click "Tools," and select "Show Inspector."

Understanding the Core Metadata Types
At its heart, photo metadata is grouped into a few key standards, each built for a different job. Knowing what they are helps you figure out what you’re looking at.
- EXIF (Exchangeable Image File Format): This is the one you’ll see most often. It’s all about the technical stuff—camera model, shutter speed, aperture, ISO settings, and sometimes even the exact GPS coordinates of where the photo was taken.
- IPTC (International Press Telecommunications Council): Originally designed for news agencies, this standard is all about description. It includes headlines, captions, keywords, and copyright details, making it a must-have for professional photographers and media outlets.
- XMP (Extensible Metadata Platform): Created by Adobe, XMP is the flexible one. It can store a huge range of information, including the entire edit history from software like Photoshop or Lightroom, plus ratings and custom tags.
The sheer volume of photos we create today makes understanding this data more important than ever. By 2025, it's estimated we'll be taking around 2.1 trillion photos a year, and over 92% of those will come from smartphones. This explosion in mobile photography means metadata is everywhere, but it's often handled inconsistently across different apps and devices.
Key Takeaway: Metadata isn't just for tech experts. It's a practical tool for verifying authenticity, organizing memories, and protecting creative work. Missing or altered metadata can be a huge red flag, which is a key concept when you learn how to check if a photo is real.
To make this a bit easier to digest, here’s a quick breakdown of what each metadata type does.
Quick Guide to Photo Metadata Types
This table summarizes the most common types of metadata, what they contain, and why they matter.
| Metadata Type | Information Included | Common Use Case |
|---|---|---|
| EXIF | Camera settings, date/time, GPS coordinates, lens type | Verifying a photo's origin and technical details |
| IPTC | Captions, keywords, copyright notices, creator's name | Organizing professional photo libraries and managing rights |
| XMP | Edit history, ratings, labels, custom tags | Tracking post-production changes and workflows |
Each standard plays a role in telling the complete story of an image, from the moment of its creation to its final edit.
Finding Photo Metadata on Your Desktop
Your own computer is the first and best place to start digging into a photo's metadata. You don't need fancy software—both Windows and macOS have powerful, built-in tools that can tell you a surprising amount about where an image came from.
Think of these native features as your first-pass investigation. They can reveal the camera settings, the exact moment a picture was taken, and sometimes even who took it. Getting to this information is easy, but knowing what you're looking at is the real key.
How to Check Photo Details in Windows
If you're on a Windows machine, all you need is a simple right-click to get started. This one action opens the door to all the core information tucked away inside the image file.
Find the picture you want to inspect in File Explorer. Just right-click on it and choose "Properties" from the menu that pops up. A new window will appear; from there, click the "Details" tab. This is where you'll find the metadata goldmine.

Windows does a great job of organizing everything into a few key groups:
- Origin: This is where you’ll find the author, copyright details, and the "Date taken" field—often the most crucial piece of information.
- Camera: The juicy stuff lives here. This is the EXIF data, showing the camera make and model, F-stop, exposure time, ISO speed, and focal length.
- Description: Look here for the title, subject, tags, and comments, which are usually part of the IPTC data standard used by journalists and photographers.
- Image: This section covers the basics, like dimensions, resolution (DPI), and bit depth.
This built-in viewer is incredibly handy for a quick reality check. For example, if you're looking at a photo that's supposed to be from a high-end DSLR but the "Camera model" field says it's from a smartphone, you've got an immediate red flag. On the flip side, a total lack of camera data can be just as suspicious, often suggesting the image was edited and exported in a way that scrubbed the original info.
Locating Metadata on macOS
For those on a Mac, Apple gives you a couple of great built-in options. Which one you use just depends on how deep you need to dive.
The fastest way to get a snapshot of the data is the "Get Info" command. Just right-click (or Control-click) an image in Finder and select "Get Info." A small window will appear, and under the "More Info" dropdown, you'll see the essentials: dimensions, color space, and the camera model. It’s perfect for a quick look.
But for the full story, you’ll want to use the Preview app.
- First, double-click the image to open it in Preview.
- From the menu bar at the top of your screen, click "Tools" and then select "Show Inspector." (The keyboard shortcut
Command + Iis a real time-saver here).
The Inspector window is a true treasure trove. It has several tabs, but the one you’ll care about most is marked with an "i" in a circle, labeled "More Info."
A pro tip for Mac users: Don't skip the "EXIF" and "TIFF" tabs in the Inspector. This is where the really granular, raw technical data is stored. You can find things like the specific lens used, whether the flash fired, and the metering mode—details the general info tab often leaves out.
The Inspector gives you a much richer view than "Get Info." You’ll see detailed EXIF data, any available IPTC info, and even a small map showing the location if GPS data was recorded. I've often found it useful to compare the "Date Time Original" with the "Date Time Digitized" fields; a mismatch can sometimes be a clue that a photo was scanned or modified long after it was first taken.
Mastering these simple desktop tools is the first step in any good image investigation. It gives you a solid baseline of information before you ever need to turn to more specialized techniques.
Checking Photo Details on Mobile Devices
Think about it: the average person snaps over 2,000 photos a year with their smartphone. That makes your phone a massive, ever-growing archive of your life. Knowing how to pull up the hidden data on those images is a surprisingly useful skill, whether you're trying to remember a trip's details or checking the legitimacy of a picture someone sent you.
The good news is that both iOS and Android have made this pretty straightforward. The built-in tools are fantastic for a quick glance at the basics—date, time, and location. But to really dig in, you might need a little extra help.

Uncovering Photo Information on an iPhone
On an iPhone, Apple has baked metadata viewing directly into the Photos app, so you don't need to download anything to get started. It's clean and simple.
Just open any photo and either tap the little "i" icon at the bottom or just swipe up on the image itself. A panel will slide into view, revealing the photo's backstory.
You’ll get a quick, easy-to-read summary of:
- The exact date and time it was taken.
- The iPhone model and which lens was used (e.g., "iPhone 15 Pro, Main Camera").
- Camera specs like the aperture (f/1.8), ISO, and shutter speed.
- If location services were on, you'll see a small map showing exactly where you stood.
One of the handiest features is the ability to adjust the date, time, and location. Just tap "Adjust" next to the timestamp or location. I use this all the time to fix the time on photos taken in a different time zone or to manually add a location to an old family photo I scanned and saved.
Navigating Metadata on Android Devices
Finding this info on an Android phone is just as easy, though the exact taps might vary a bit based on who made your phone—Samsung, Google, and OnePlus all have slightly different gallery apps. For a consistent experience, I usually recommend people stick with Google Photos.
In Google Photos, just open an image and swipe up (or tap the three-dot menu). You'll get a similar panel with the date, time, and a location map. It also shows you the camera model, aperture, ISO, file size, and resolution.
Real-World Scenario: A friend texts you a stunning photo of a beach, but doesn't say where it is. On either platform, a quick swipe up will show you the embedded map data, if it's still there. Mystery solved in seconds.
These native tools are great, but they are designed for convenience. They show you the most common, user-friendly data but intentionally hide the more granular stuff. You’ll see the camera model, but probably not the lens serial number or the firmware version it was running.
When You Need More Detail: Third-Party Apps
For those times when the basics just aren't enough, you'll want to turn to a dedicated metadata viewer app. These tools are built to parse and display every last shred of EXIF, IPTC, and XMP data buried in the file.
A couple of solid options I've used are:
- Photo Investigator (iOS): This app gives you an exhaustive breakdown of every metadata tag, including the obscure ones that Apple's Photos app ignores.
- EXIF Metadata (Android): A clean, no-frills app that lays out all the EXIF data in an organized list, from white balance settings to the light source used.
This is where things get interesting, especially if you're trying to verify a photo's authenticity. A dedicated app might reveal software tags showing a photo was edited in Photoshop—information the standard gallery apps would never show you. These tools essentially put a forensic-level analysis tool right in the palm of your hand.
Going Deeper with Advanced Tools
Sometimes, the built-in photo viewers on your computer or phone just don't cut it. When you need to dig deeper—for forensic analysis, journalism, or serious research—the graphical interfaces often hide the most crucial details. This is where you need to roll up your sleeves and use command-line tools.
The undisputed king of this world is ExifTool. It’s a free, open-source workhorse that can read, write, and manipulate metadata from a mind-boggling number of file types. I know the command line can look intimidating, but its power to extract every last shred of data, including obscure or proprietary tags, makes it an essential skill for anyone serious about verification.
Getting Started with ExifTool
Think of ExifTool as the master key for your image files. It doesn't give you the friendly, simplified summary; it shows you the raw, unfiltered data packed inside the file. Getting it set up is surprisingly easy, no matter your operating system.
- On Windows: The easiest way is to download the standalone Windows Executable. From there, you can just drag an image file right onto the
exiftool(-k).exeicon, and a command prompt window will pop up with all of its metadata. - On macOS and Linux: It's usually a quick, one-line command in your Terminal. If you're on a Mac and use Homebrew, it's as simple as typing
brew install exiftool.
Once it's installed, you’re ready to go. You don't need to be a programmer; you just need to learn a few simple commands to ask the right questions.
My Go-To Commands for Photo Analysis
The beauty of ExifTool is its directness. You just point it at a file and ask for what you want. No menus, no clicking through windows—just a question and a straight answer.
Let's imagine you have a file named mystery-photo.jpg. Open your command prompt or Terminal, make sure you're in the same folder as the image, and try these out:
Get Everything: This is your starting point. It just dumps every single tag ExifTool can find in the file. It can be a lot, but it’s comprehensive.
exiftool mystery-photo.jpgFilter for Specifics: Too much noise? You can zero in on what matters. If you only care about the camera and lens used, this command is perfect.
exiftool -camera* -lens* mystery-photo.jpgCheck for Location Data: This is one of the first things I check. A quick command to see if the image has any GPS coordinates embedded.
exiftool -gps* mystery-photo.jpg
These commands alone will give you far more information than a standard properties window ever could. You might find the camera’s serial number, the exact version of the software used for editing, or even the camera's internal temperature when the photo was snapped.
A Real-World Example: A journalist I know received a photo supposedly taken at a protest. Using
exiftool, they found a "Software" tag showing the image was modified in Photoshop just minutes before they received it. While that doesn't automatically mean the photo is fake, it's a massive red flag that tells them to investigate further.
How to Analyze Hundreds of Photos at Once
This is where ExifTool really shines. Let's say you have a folder filled with hundreds of photos from an event. How can you quickly verify they were all taken with the same type of camera?
Doing this by hand would be a nightmare. With ExifTool, it's one simple command.
exiftool -cameramodel -r /path/to/your/folder/
The -r part tells ExifTool to run recursively, meaning it will check every file in that folder and all its subfolders. The command spits out a clean list of the camera model for each photo, so you can spot any odd ones out in seconds. You can even pipe that output into a CSV file to analyze in a spreadsheet.
This level of analysis is also becoming more important as AI-generated media gets more common. Many AI images don't have traditional camera data, but some models are starting to embed their own unique metadata fingerprints. Learning how to check this metadata is a great first step, and it works well alongside a dedicated image AI detector to get the full picture.
For those who want to master the technical side of how digital images are made and managed, an advanced photography course can provide a solid foundation. When you get comfortable with a tool like ExifTool, you’re no longer just viewing metadata—you’re interpreting the story it tells.
Understanding Metadata Privacy and Accuracy
The ability to pull metadata from a photo is a powerful tool for verification, but it's a classic double-edged sword. Every time you share a geotagged picture, you could be accidentally broadcasting your home address, your office, or even your child's school to anyone who knows where to look. Privacy isn't just a buzzword here—it's about keeping a tight rein on your personal information.
It goes beyond just your location, too. Metadata often includes the serial number of your camera or phone. This creates a kind of digital fingerprint that can be used to link different photos back to you, even if you post them from an anonymous account. Just being aware of this is the first real step toward sharing images more responsibly.
Protecting Your Location Data
The most obvious privacy risk is the GPS data embedded in your photos. It's fantastic for mapping out your vacation shots, but it's the last thing you want attached to a photo of your new TV that you're trying to sell online.
Thankfully, scrubbing this data before you hit "share" is pretty straightforward.
- On a PC: Just right-click the file, navigate to
Properties>Details, and you'll see an option to "Remove Properties and Personal Information." This lets you create a clean copy with all the sensitive stuff stripped out. - On a Mac: macOS doesn't have a simple one-click remover built-in. However, opening an image in Preview, duplicating it (
CMD + Shift + S), and saving a new version often removes the location data. If you need a guarantee, a third-party app is your best bet. - On Mobile: Both iOS and Android have gotten much better at this. When you go to share a photo on an iPhone, look for the "Options" button at the top of the share sheet. Tap it, and you can toggle off "Location" right there.
For a deeper dive into data privacy laws, especially concerning personal information, this practical AI GDPR compliance guide is a great resource. It helps put into context your rights and responsibilities when you're dealing with data hidden inside files.
The Problem of Stripped and Inaccurate Data
So what happens when you go looking for metadata and find… absolutely nothing? It’s a lot more common than you’d think. Most of the big social media platforms intentionally strip almost all EXIF data from images the moment they're uploaded.
When you upload a photo to platforms like Instagram, Facebook, or X (formerly Twitter), their servers process the image. This process typically removes the vast majority of original metadata, including camera settings, lens information, and GPS coordinates, primarily to protect user privacy and standardize files.
This means if you download a picture from someone's feed and try to inspect it, you'll likely hit a dead end. The data was scrubbed long before it ever got to you. While this is great for user privacy, it throws a huge wrench in any attempt to verify the authenticity of images we see online.
The process below shows how a tool like ExifTool becomes essential. It helps you find whatever little data might have survived or simply confirm that an image has been wiped clean.
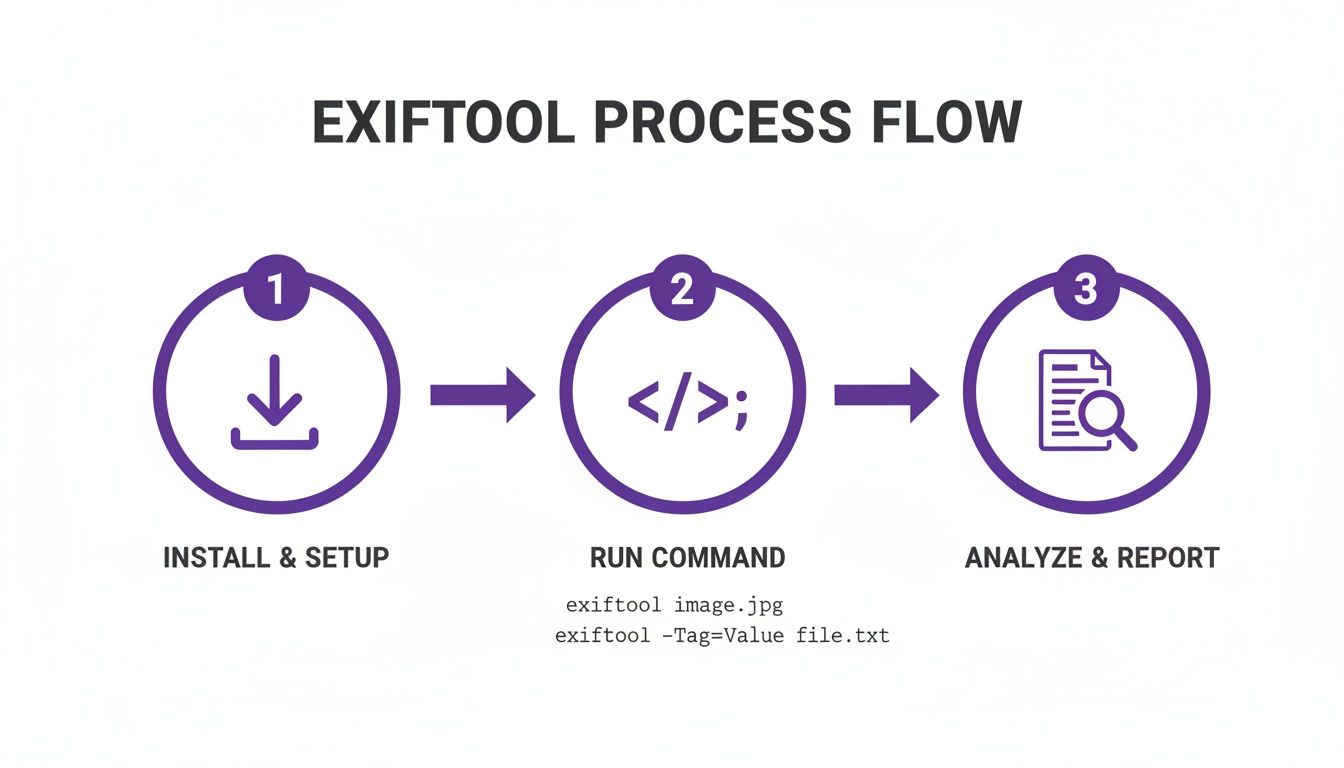
This simple three-step flow—install, run the command, and analyze the output—is the foundation for any serious analysis that goes beyond what your computer's basic "Properties" window can show you.
New Challenges from AI Generated Images
The explosion of AI image generators adds a whole new wrinkle to this. Since these images aren't created by a physical camera, they're born without traditional EXIF data. You won't find a shutter speed, ISO, or a GPS tag from a real-world device.
This complete lack of data is, ironically, a clue in itself. If you come across a stunningly realistic photo that has zero camera information, it’s a big red flag that it might be AI-generated. Some AI tools are starting to embed their own watermarks or tags, but it’s far from a universal standard.
As the number of digital photos in the world skyrockets, metadata becomes more valuable for forensics, but at the same time, it’s also easier than ever to fake or remove it.
This is why a multi-layered approach is non-negotiable. Checking the metadata is a critical first step, but it's not the whole story. You have to combine it with a critical eye and, increasingly, with specialized detection tools. Metadata can also hold vital clues about ownership, so for a complete workflow, take a look at our guide on how to check if an image is copyrighted. Thinking through these issues is the only way to really get a handle on the authenticity and origin of any image you find online.
Common Questions About Photo Metadata
Once you start digging into photo metadata, you'll inevitably run into a few common roadblocks. Knowing what they are ahead of time can save you a ton of frustration, especially when the data you find—or don't find—doesn't quite make sense.
Think of this as your field guide to troubleshooting metadata. We'll walk through the most frequent "what if" scenarios, from puzzling gaps in the data to the practical limits of what this information can actually prove.
Why Is There No GPS Data in My Photo?
This is probably the number one question I get. You know you took a photo on your phone, but the location information is nowhere to be found. What gives?
Nine times out of ten, it’s one of these culprits:
- Location Services Were Off: This is the most common reason. The camera app simply didn't have permission to access your device's location when the picture was snapped.
- The Photo Was Taken Indoors: GPS signals are notoriously weak inside buildings. Your phone might not have been able to get a solid satellite fix, so it didn't record any coordinates.
- The Data Was Stripped: Many social media platforms (like Instagram and Facebook) automatically remove location data when you upload a photo for privacy reasons. The person who sent you the image might have also scrubbed it themselves before sharing.
Can Photo Metadata Be Faked or Edited?
Yes, absolutely. It's crucial to remember that while EXIF data is generated automatically by a camera, it's not a cryptographically secure, unchangeable record.
Using tools like the ExifTool we looked at earlier, or dozens of other metadata editors, anyone can modify or completely fabricate a photo's metadata. They could change the "Date Taken" to make an event seem more recent, alter GPS coordinates to place a photo on a different continent, or even swap out the camera model.
This is why you have to treat metadata as a clue, not as gospel.
Key Insight: Finding metadata is just the first step; critical thinking is the second. Always be on the lookout for inconsistencies that don't add up, like a photo dated 1995 that lists a modern smartphone as the camera.
What Does It Mean if the Metadata Is Completely Empty?
Finding an image file with practically no metadata is a huge red flag, but it doesn't automatically mean the picture is fake. There are a few perfectly legitimate reasons this can happen.
Aggressive image compression is a big one. Many online tools and software designed to shrink file sizes will strip out all non-essential data to make the file as small as possible. Web designers do this all the time to make pages load faster.
Another possibility? It's a screenshot. When you capture your screen, the new image file has very little metadata beyond basic info like creation date. It won't have any of the rich camera-specific EXIF data because, well, no camera was involved.
And, of course, a total lack of metadata is a classic sign of many AI-generated images. Since they were never captured by a physical camera in the real world, they're born without any EXIF data. This absence of information is often one of the very first indicators that an image might not be authentic.
When metadata isn't enough to tell the full story, you need a tool built for today's visual landscape. The AI Image Detector provides a fast, privacy-focused analysis to determine if an image was created by a human or generated by AI. Get the clarity you need to verify images with confidence at https://aiimagedetector.com.