
Mastering Image Photoshop Detection Like a Pro
Knowing how to spot a photoshopped image is a critical skill for navigating our digital world. It's not just about catching minor touch-ups; it’s about identifying everything from subtle tweaks to major fabrications designed to deceive. This process is part detective work, part technical analysis, combining a trained eye with powerful software.
Why Spotting a Doctored Image Matters More Than Ever
We're drowning in digital images. They fill our social media feeds, illustrate news stories, and shape our understanding of reality. In this environment, telling what's real from what's fake has become incredibly difficult, and the stakes are high.
A single altered photo can go viral in minutes, spreading misinformation that sways public opinion or fuels online fraud. The ability to spot these manipulations is no longer just for forensic experts; it's an essential part of digital literacy for everyone. This skill is vital in countless situations, like when you need to understand how to tell fake IDs, where even a tiny edit can have massive legal and financial fallout.
The Two Core Approaches to Detection
To effectively identify a manipulated image, you need to think like a modern-day detective. That means combining old-school visual inspection with new-school technology.
- Manual Forensic Investigation: This is the hands-on detective work. You’ll train your eyes to scrutinize an image for the classic giveaways—inconsistent shadows, impossible lighting, blurry edges, or patterns that reveal a clone tool was used.
- Automated AI Analysis: This is where you bring in the high-tech gear. Specialized tools analyze an image at the pixel level, catching artifacts the human eye would never see. They can spot compression differences, inconsistencies in digital noise, and other digital fingerprints left behind by editing software.
The need for reliable image photoshop detection is exploding. In fact, the market for fake-image detection is expected to hit nearly USD 5.89 billion by 2030. This incredible growth, tracked by firms like Mordor Intelligence, is a direct result of just how easy it has become to create convincing fakes with advanced editors and AI.
The secret to effective detection is to approach every image with a healthy dose of skepticism and a clear methodology. Don't just glance at a photo—interrogate it. Every image tells a story, and sometimes, that story is about the edits it’s hiding.
Manual vs Automated Detection Methods at a Glance
When deciding how to approach a suspicious image, it helps to understand the strengths and weaknesses of each method. Here’s a quick breakdown to help you choose the right tool for the job.
| Attribute | Manual Forensic Analysis | Automated AI Detection |
|---|---|---|
| Accuracy | Varies by skill; can be fooled by sophisticated edits | High, especially for subtle digital artifacts |
| Speed | Slow and methodical; requires careful examination | Extremely fast; analyzes images in seconds |
| Effort | High; requires training, focus, and a keen eye | Low; requires uploading the image and interpreting results |
| Use Case | Deep-dive investigations, verifying specific claims | Rapid, high-volume screening (e.g., social media feeds) |
| Weakness | Can miss pixel-level data; subject to human error | Can be fooled by new AI models; may provide false positives |
Ultimately, the best strategy is to use both. A quick scan with an AI tool can flag potential issues, which you can then investigate more deeply with your own eyes. This guide will walk you through mastering both techniques, giving you the skills to see the digital world with a more critical and informed perspective.
Decoding Images With Your Own Eyes

Before you reach for any fancy software, remember that your own eyes are your most powerful tool for image photoshop detection. You don't need to be a digital forensics expert to get started. Manual inspection is all about knowing what to look for—the tiny, unnatural details that digital editing often leaves behind.
By training your brain to spot these tell-tale inconsistencies, you can catch a surprising number of fakes without any special tools. It all starts by digging into the data hidden just beneath the surface.
Digging into the Digital DNA with Metadata
Every single photo from a digital camera or smartphone contains a bundle of hidden information called EXIF data (Exchangeable Image File Format). Think of it as the image’s digital fingerprint, logging crucial details about how, when, and even where the photo was taken.
You can usually find this data by right-clicking an image file, selecting "Properties" or "Get Info," and navigating to the "Details" tab.
While you're sifting through this info, you’re hunting for one key clue: the Software tag. If an image was opened and saved in a program like Adobe Photoshop, this field will often say "Adobe Photoshop" and might even include the version number. Finding this tag doesn’t automatically mean an image is a malicious fake, of course. Professional photographers use Photoshop for everyday tasks like color correction.
Think of the 'Adobe Photoshop' metadata tag as a flag, not a verdict. It’s a signal that the image has been altered in some way, prompting you to look closer. The real investigation is figuring out the nature and extent of those alterations.
This is your first critical checkpoint. If someone claims a photo is completely untouched, but the metadata shows it was saved in Photoshop, you've just found your first red flag. It’s the sign you need to start a much deeper visual analysis.
Scrutinizing Light and Shadow for Inconsistencies
One of the hardest things for any forger to get right is the physics of light. It’s incredibly difficult to fake convincingly. In a real photo, the lighting and shadows are consistent, all originating from a logical light source. Manipulated images often fall apart right here, with glaring physical impossibilities.
Start by identifying the main light source in the picture. Is it the sun? An overhead lamp? A camera flash? Once you know where the light is coming from, carefully examine the shadows cast by different objects and people.
Here are the key questions to ask yourself:
- Shadow Direction: Are all the shadows pointing away from the light source? If one person's shadow points left while another's points right, something is very wrong.
- Shadow Sharpness: Objects closer to the light source cast harder, more defined shadows, while shadows from distant objects are softer and fuzzier. A razor-sharp shadow right next to a blurry one (on the same ground plane) is a classic sign of a composite image.
- Light on Subjects: Pay attention to how light hits different people. If one person is brightly lit from the front, but the person right next to them is lit from the side, it’s a strong indication one of them was added later.
Imagine a group photo taken outside on a sunny day. The sun is a single, powerful light source. Everyone in that photo should have shadows of a similar length and direction. If one person has a short shadow directly beneath them (suggesting it’s high noon), while another has a long, soft shadow (suggesting late afternoon), the image has almost certainly been doctored.
Spotting Common Digital Manipulation Artifacts
Beyond breaking the laws of physics, digital editing tools leave their own unique fingerprints. Learning to spot these digital artifacts is a core skill in image photoshop detection. Don't be afraid to zoom way in on suspicious areas—these clues are often very subtle.
Keep an eye out for these tell-tale signs of manipulation:
- Cloning Repeats: The clone stamp tool is a favorite for removing unwanted objects by copying one part of an image over another. Look for repeating patterns in textures like clouds, grass, or bricks that seem just a little too perfect or identical.
- Blurry or Jagged Edges: When an object is cut out and pasted onto a new background, the edges are often the biggest giveaway. They might appear unnaturally sharp, pixelated, or have a strange, blurry "halo" around them where the selection wasn't quite perfect.
- Weird Textures and Warping: Tools like "liquify" are often used to subtly alter a person's shape. The trick is to look at the background behind them. A perfectly straight line in a wall or doorframe that suddenly curves or bends around someone's body is a dead giveaway.
By systematically working through these physical and digital checks, you turn a simple glance into a powerful forensic process. You’re no longer just a passive viewer—you're an active investigator, decoding the image to uncover its true story.
Uncovering Digital Fingerprints With Advanced Analysis
While your own eyes are great for catching obvious fakes, some of the most compelling evidence is completely invisible. We need to go deeper, to the pixel level, to find the digital fingerprints that editing tools leave behind.
These forensic methods aren't about spotting weird shadows or impossible physics. Instead, they rely on the mathematical scars created every time an image is altered. Think of an original photo as a smooth, pristine surface. Every edit, especially when re-saved as a JPEG, creates subtle damage. Forensic tools are built to make that damage light up like a neon sign.
Two of the best techniques I've used for this are Error Level Analysis (ELA) and noise analysis. They add a crucial layer of technical proof to any image photoshop detection workflow.
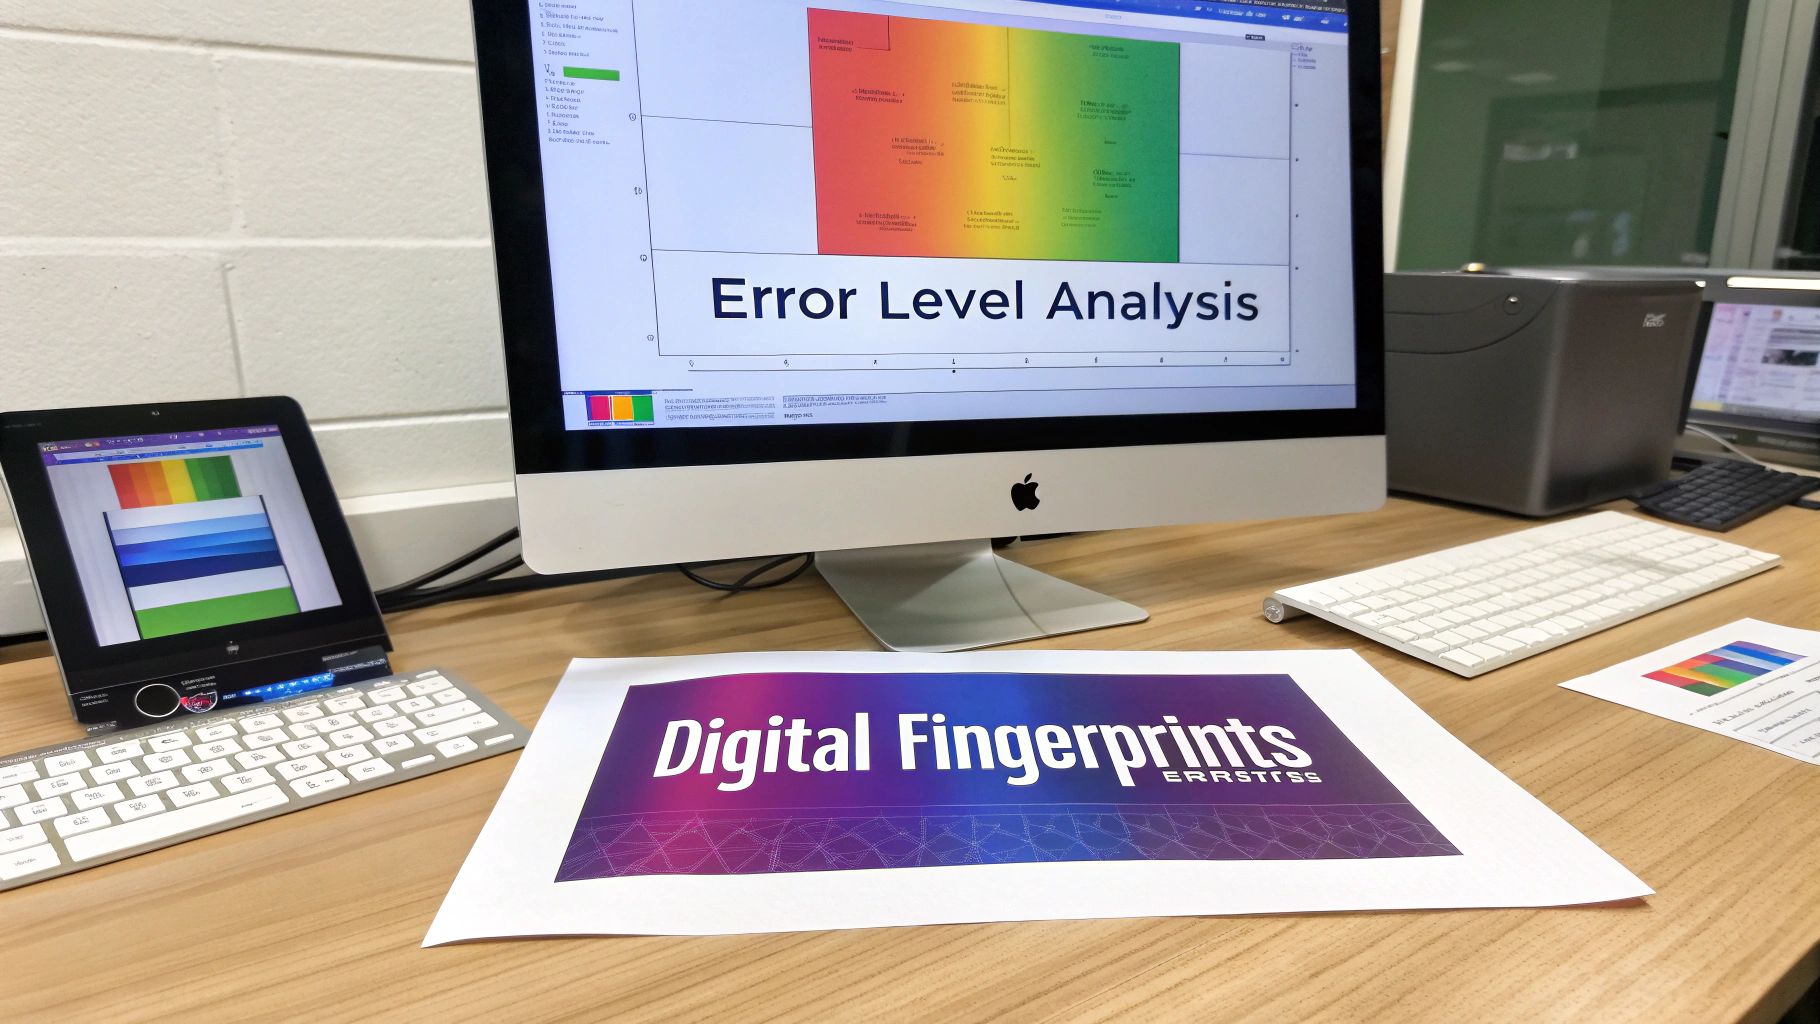
Visualizing Edits with Error Level Analysis
One of the most powerful tools in my digital forensics toolkit is Error Level Analysis (ELA). This clever technique highlights differences in the JPEG compression levels across an image.
Here's the concept: when you save a photo as a JPEG, it gets compressed to save space, but it also loses a little bit of data. An original, untouched photo should have a more-or-less uniform level of compression across the entire frame. But when someone pastes an object into the photo and saves it again, that new part has a different compression history from everything else.
ELA makes these differences pop. The tool re-saves the image at a set quality level (usually 95%) and then compares it to the original. In the resulting ELA image, here's what to look for:
- Dull, dark, or uniform areas suggest a consistent compression history. This is what you expect from an authentic photo.
- Bright, glowing, or high-contrast spots scream that something has been altered. These areas have a different compression signature.
For example, this ELA scan clearly shows a pasted cat. Notice how it and its shadow are dramatically brighter than the uniform, darker background. That's a dead giveaway. While high-contrast edges in an original photo will naturally look a bit brighter, you’re looking for large, inconsistent patches like this one.
Reading the Digital Grain with Noise Analysis
Another go-to technique is noise analysis. Every digital camera sensor produces a fine, random, grain-like pattern called digital noise. In a real, unedited photo, this noise pattern should be consistent across the entire image. It’s a natural artifact of the photographic process.
But what happens when someone copies a section from one photo and pastes it onto another? They aren't just pasting pixels—they're pasting a completely different noise pattern. Even if the edit looks perfect to the naked eye, the underlying noise structure will be a mess.
A manipulated image often looks like a patchwork quilt under noise analysis. You might see a smooth area where noise was digitally scrubbed away or a blocky section with a completely different grain texture, instantly revealing the boundaries of the edit.
Noise analysis tools can highlight these inconsistencies automatically. A clean, uniform noise pattern is a strong vote for authenticity. On the other hand, a chaotic or patchy noise pattern is powerful evidence that the image is a composite.
While metadata can offer clues, analyzing digital noise gives you much more definitive proof. If you want to learn more about what data is stored within an image file, check out our guide on finding photo metadata.
Getting a feel for these advanced techniques takes practice, but they provide a level of certainty that visual checks alone just can't match. Studies show that human observers spot subtle facial manipulations only about 53% of the time. In contrast, an AI detector from Adobe Research hit up to 99% accuracy on faces altered with Photoshop's Liquify tool. You can read more about these AI detection advancements at Adobe Research.
Using AI for a Quick First Look
While the forensic methods we've covered are incredibly revealing, they can also be time-consuming. You don't always have an hour to spend scrutinizing every single image that crosses your desk. This is where AI-powered tools provide a massive advantage, acting as a fast and effective first pass for image photoshop detection. These tools run on algorithms that can spot digital red flags much faster than the human eye ever could.
And frankly, we need the help. Research shows that the average person's ability to tell a real photo from a fake one is a dismal 50%—no better than a coin flip. Even people who use AI tools regularly don't fare much better, which really underscores the need for good technical backup.
How to Use an AI Image Detector
Getting started with an AI detector is usually dead simple. The tools are designed for speed, so the process is almost always the same, no matter which platform you use.
First, you'll upload the image in question. Most detectors, including our own AI Image Detector, have a straightforward drag-and-drop box or a file upload button. Just select the suspicious image from your device to kick things off.
From there, the AI takes over. The system immediately gets to work, scanning the file for all sorts of tell-tale signs of manipulation—things like pixel-level weirdness, compression mismatches, and other digital fingerprints left behind by AI generators or editing software.
Within seconds, you get a report. This usually gives you a clear verdict, like "Likely Human" or "Likely Manipulated," along with a confidence score. The real skill isn't just getting the report; it's knowing how to read it.
Making Sense of Confidence Scores
The most critical piece of information in that report is the confidence score. It’s typically a percentage that shows how certain the AI is in its conclusion. For example, you might see a result that says "92% Probability of AI/Manipulation."
It’s vital to understand what that number actually means.
A high confidence score for manipulation isn't a final verdict. Think of it as a strong statistical signal that the image's digital DNA doesn't match that of an original, untouched photo. Your job is to use that signal to guide a smarter, more targeted manual check.
A 92% score is a huge red flag telling you exactly where to focus your energy. It’s the cue to zoom in, double-check the shadows, or run a deeper forensic analysis to find the proof. On the flip side, a low score, like "15% Probability," can give you reasonable assurance that the image is probably clean, saving you from a deep dive that isn't necessary.
The technology behind these scores is pretty complex, often picking up on patterns that are completely invisible to us. If you want to peek under the hood, our guide on how AI detectors detect AI-generated content breaks down the technical details.
Understanding AI Limitations and Best Practices
As powerful as AI detectors are, they aren't magic. They can make mistakes. The best approach is to treat them as one tool in a larger verification workflow, not as the ultimate arbiter of truth.
Keep these limitations in mind:
- New Editing Techniques: An AI is only as smart as the data it was trained on. A brand-new Photoshop feature or a novel generator might create artifacts the AI hasn't been taught to look for yet.
- High-Skill Fakes: A true master of digital editing can sometimes create a forgery so seamless that it fools both people and algorithms.
- Honest Edits: Not all manipulations are deceptive. Basic adjustments like cropping, brightening a photo, or adding an Instagram filter are still technically edits. Most good detectors can tell the difference, but you still need to apply context.
AI’s ability to recognize patterns is incredibly advanced, extending even to things like developing techniques for solving image-based captchas. But that power has its limits.
The most reliable workflow combines the speed of AI with the critical thinking of a human analyst. Use the AI detector for triage—to quickly sift through images and flag the suspicious ones. Then, apply your own forensic skills to confirm the findings and uncover the real story.
Creating Your Professional Verification Workflow
For professionals like journalists, fact-checkers, and researchers, the stakes are just too high to rely on a single method for image photoshop detection. A quick glance is never enough. What you really need is a structured, repeatable process that marries your own human insight with a solid technical analysis.
A professional workflow is all about integrating the techniques we’ve discussed into a logical sequence. It’s a system to make sure no stone is left unturned. This isn't about running one test and calling it a day; it’s about building a case, piece by piece. You use evidence from one method to guide your investigation with another. That cross-validation is the absolute core of any serious verification effort.
Starting With a Quick Triage
Your workflow should always kick off with the fastest, most accessible checks. The goal here is to get a baseline read on the image—to quickly spot obvious red flags or, conversely, build some early confidence in its authenticity. Think of it as an efficiency play, sorting the most suspicious images from the probably-legitimate ones without sinking hours into every single one.
Start your process with these two foundational checks:
- Reverse Image Search: This is your first and simplest move. Use a service like Google Images or TinEye to see where else the photo has appeared online. This can instantly uncover the original source, context, and publication date, often debunking a fake claim in a matter of seconds.
- Initial Metadata Scan: Take a quick look at the image's EXIF data. Specifically, hunt for the "Software" tag to see if it was saved in a program like Adobe Photoshop. This isn't definitive proof of a fake, but it's a critical clue that tells you the image has been processed and warrants a much closer look.
If a reverse image search reveals the photo is a decade old but is being passed off as new, your work is probably done. Likewise, if the metadata shows a Photoshop tag on an image claimed to be "straight from the camera," you know it's time to dig deeper.
This simple, three-step process is a great way to think about incorporating an AI tool into your workflow.
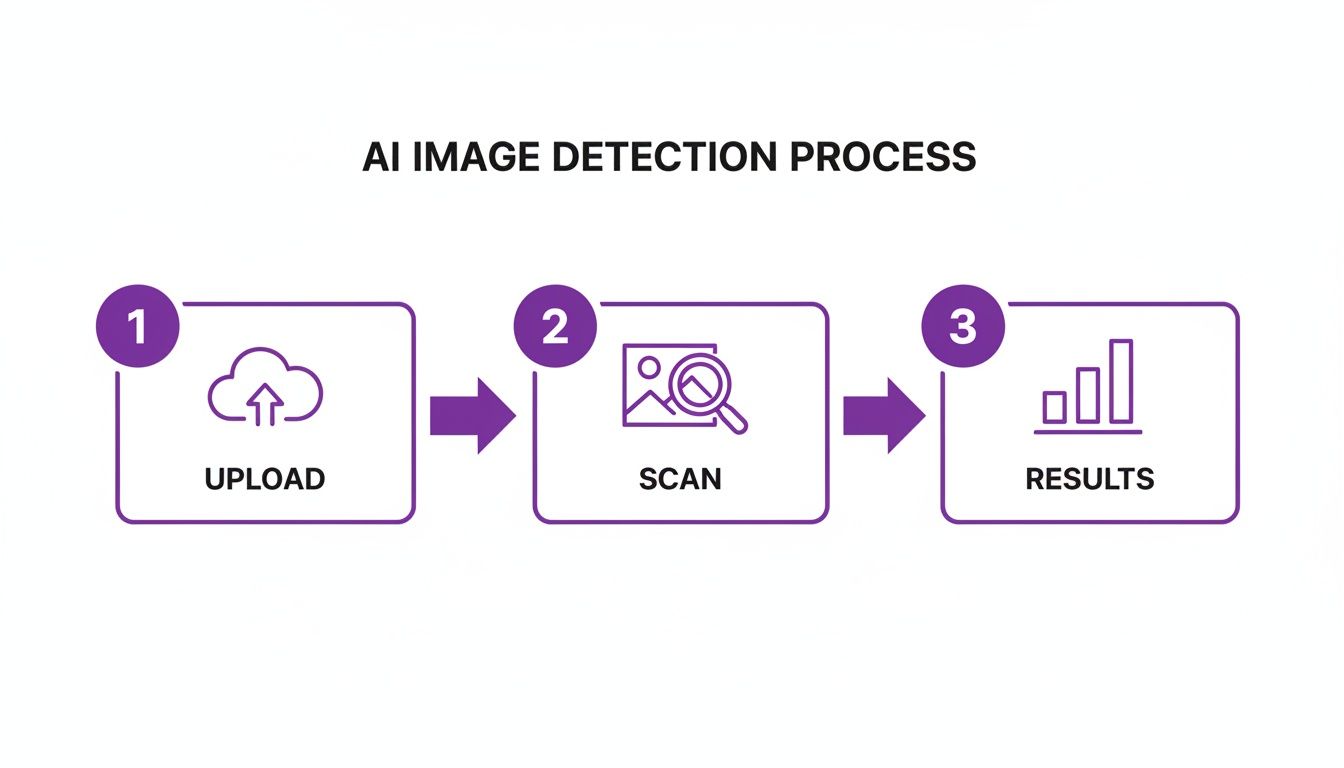
As you can see, the AI detection phase is built for speed—upload, scan, and get results—making it a perfect tool to deploy right after your initial triage.
Moving to a Deeper Analysis
Once an image gets flagged by your initial checks, you can graduate to the more methodical and time-consuming part of the analysis. This is where you combine automated tools with your own trained eye to look for the definitive proof of manipulation. This phase is all about gathering specific, concrete evidence.
Here’s how to blend AI and manual inspection for the best results:
- Run an AI Detector Scan: Before you start zooming in on individual pixels, get an unbiased opinion from an AI. Upload the image to a detector to get a confidence score. A high probability of manipulation gives you a strong signal to proceed with a more forensic investigation.
- Conduct a Manual Visual Check: Armed with the AI's feedback, it's time to perform a detailed visual inspection. Scrutinize shadows, light sources, reflections, and edges for any inconsistencies. You’re hunting for cloning artifacts, bizarre textures, or subtle signs of warping in the background.
The real power here comes from the synergy between these methods. For instance, if an AI detector flags a specific part of a photo as suspicious, you can focus your manual analysis directly on that area, looking for the tell-tale blurry edges or noise inconsistencies that would confirm an edit.
Confirming With Forensic Tools
If you’ve gathered some compelling evidence of tampering but need that final, incontrovertible proof, it’s time to bring out the heavy-duty forensic tools. This final stage provides the kind of digital fingerprints that are nearly impossible to fake and can serve as the ultimate confirmation in your report.
Your last verification steps should be:
- Error Level Analysis (ELA): Use an ELA tool to visualize differences in JPEG compression across the image. Look for bright, glowing areas that stand out from everything else—a classic sign that an element was pasted in from another source.
- Noise Analysis: Check for a consistent grain or noise pattern throughout the image. Any patches where the noise is missing, smeared, or has a different texture are strong indicators that you’re looking at a composite image.
Following this layered approach—from a quick search to a deep forensic analysis—helps you build a robust and defensible conclusion. To help structure this process, we've put together a sample checklist you can adapt for your own work.
Sample Image Verification Checklist
A checklist like this ensures you're consistent and thorough with every investigation. It's a simple way to create a repeatable process that holds up to scrutiny.
| Check Number | Verification Step | Key Indicator to Look For | Result (Pass/Fail/Inconclusive) |
|---|---|---|---|
| 1 | Reverse Image Search | Prior appearances, original context, date | |
| 2 | Metadata (EXIF) Scan | "Software" tag (e.g., Photoshop) | |
| 3 | AI Detector Scan | Confidence score for manipulation | |
| 4 | Shadow & Lighting Analysis | Inconsistent shadow angles or light sources | |
| 5 | Visual Artifact Check | Cloning patterns, blurry edges, warping | |
| 6 | Error Level Analysis (ELA) | High-contrast areas indicating edits | |
| 7 | Noise/Grain Analysis | Inconsistent noise patterns |
Documenting each step is crucial for professional accountability. It creates a clear, transparent record of your findings and the evidence that supports them. For more tips, you can explore our detailed guide on how to check if a photo is real.
Got Questions? We've Got Answers
Diving into the world of image photoshop detection always brings up a few key questions. It's one thing to learn the techniques, but it's another to understand the nuances and limitations you'll face in the wild.
Let's clear up some of the most common points of confusion. Getting these concepts straight will help you avoid rookie mistakes and make your verification process much more effective.
Can Image Detection Tools Be Fooled?
The short answer is a definite yes. Both the human eye and automated tools can be tricked, especially when you're up against a skilled forger.
An expert manipulator can create edits with flawless lighting, consistent shadows, and nearly invisible artifacts. They can even go a step further, adding a uniform layer of digital noise across the image to mask their tracks from forensic tools like Error Level Analysis.
AI detectors aren't foolproof, either. They learn from massive datasets of real and fake images, but they can be caught off guard by manipulations made with brand-new software or a novel technique they haven't been trained on yet. It's a constant cat-and-mouse game.
This is exactly why relying on a single verification method is a huge mistake. A solid workflow always combines your own visual inspection with multiple automated tools. It’s the only way to build a robust defense against sophisticated fakes.
Think of it as a system of checks and balances. Each method has its own blind spots, but using them together covers a much wider range of potential deceptions.
Photoshopped vs. AI-Generated: What's the Difference?
It’s incredibly important to distinguish between a "photoshopped" image and an "AI-generated" one. They are fundamentally different beasts.
A photoshopped image starts with a real photograph. A person then uses editing software to alter that original photo—maybe they remove an object, add a person from another picture, or subtly change someone's appearance.
An AI-generated image, on the other hand, is created from scratch by an algorithm. It never existed as a physical scene captured by a camera. It's a synthetic reality built from a text prompt.
Because their origins are so different, the detection methods are completely different, too:
- Photoshop detection is all about finding clues of editing. You're looking for mismatched compression levels, inconsistent noise, cloning artifacts, and blurry edges that give away where the original image was tampered with.
- AI detection focuses on artifacts from the generation process. You're hunting for things like weird, waxy skin textures, anatomical impossibilities (the classic six-fingered hand), illogical details in the background, or tell-tale pixel patterns left behind by the AI model.
Does an EXIF Tag Mean an Image Is Fake?
Not at all. Seeing "Adobe Photoshop" in an image's EXIF data just tells you the file was opened and saved with that software. It is not proof of a malicious fake.
In reality, nearly every professional photographer uses Photoshop for completely legitimate, non-deceptive work. These routine edits often include:
- Correcting color and white balance
- Cropping and resizing for composition
- Removing minor dust spots or blemishes
- Adjusting brightness and contrast
These actions are technically "alterations," but they aren't what we mean by malicious manipulation. The EXIF tag is just a flag—it tells you the image isn't straight out of the camera. It’s a good reason to take a closer look, but it doesn't say anything about the intent or extent of the changes.
Ready to put these detection skills to the test? With the AI Image Detector, you can get a fast, reliable analysis in seconds. Our tool scans for subtle artifacts to give you a clear confidence score, helping you make informed decisions about the images you encounter.


