
Your Practical Guide to Using a Copyright Image Checker
So, what exactly does it mean to use a copyright image checker? It’s not about a single tool, but a deliberate process for digging into an image's backstory—its origin, its owner, and the rules for using it. Think of it as detective work that keeps you on the right side of the law.
This workflow combines a few key techniques, like reverse image searches and metadata analysis, to piece together the puzzle and make sure the visual you want to use won't land you in legal trouble.
Why You Need a Copyright Image Checker Now More Than Ever
You've found it. The perfect image for your blog post, ad campaign, or social media feed. But just as you’re about to hit "publish," a small voice of doubt creeps in: "Am I actually allowed to use this?"
In a world overflowing with digital content, the line between "free for the taking" and "a lawsuit waiting to happen" has become incredibly blurry. Guessing is a risk most of us—marketers, creators, and business owners—simply can’t afford to take.
This guide isn't about abstract legal theory. It’s a practical, step-by-step roadmap for verifying image rights. The need for a solid system has never been more critical. An eye-opening study found that a staggering 82% of images online in the US and EU have been altered or can be traced back to protected works. If you're curious about the data, you can dive into the full study on AI detector market trends to see just how widespread the issue is.
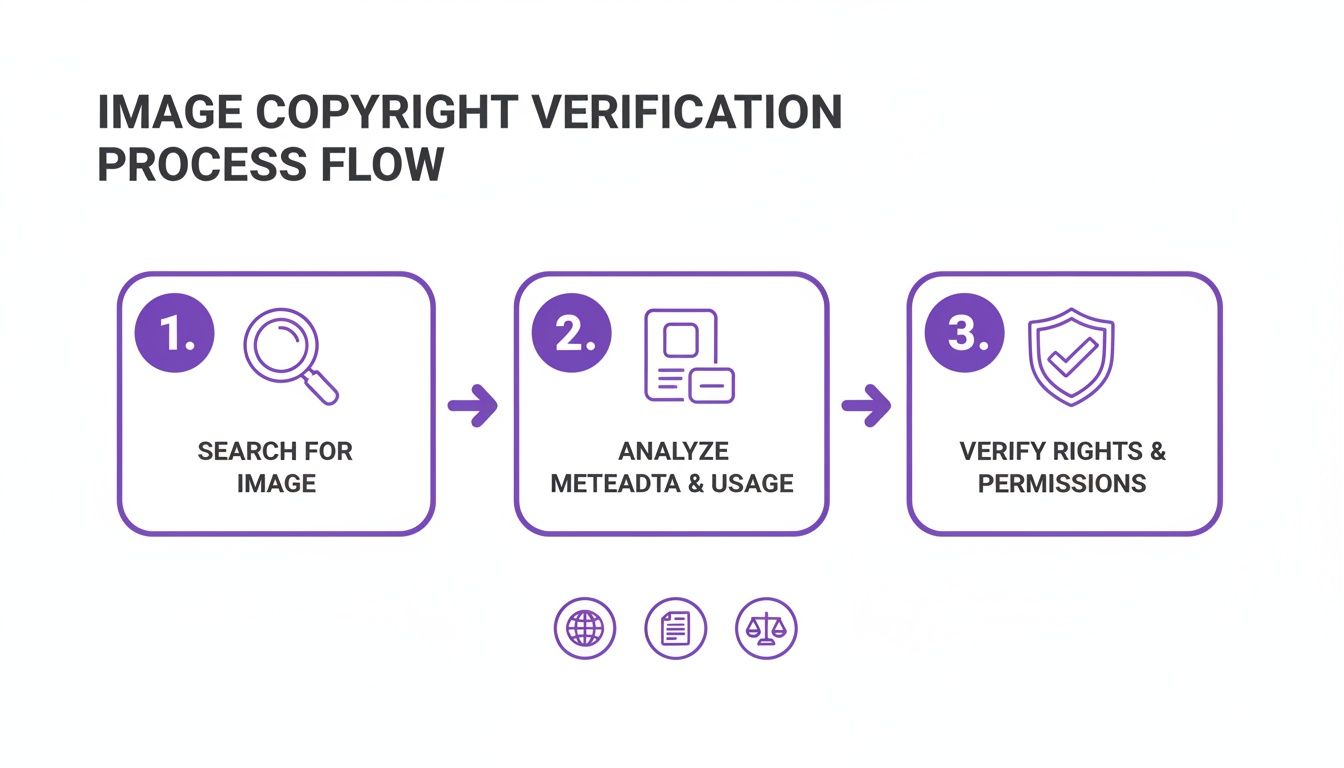
The process boils down to a few core actions: find the source, analyze the details, and confirm the permissions.
Remember, one quick search is rarely enough. A layered, methodical approach is what truly protects you from a surprise infringement claim down the road.
The Real Cost of Skipping a Check
Turning a blind eye to copyright isn't just sloppy—it can be a costly mistake. A single unauthorized use can trigger a demand letter from a photographer or a stock photo agency, often demanding hundreds, if not thousands, of dollars in retroactive licensing fees. And that's often just the starting point.
The core issue isn't just about avoiding lawsuits. It's about maintaining professional integrity and respecting the work of creators who depend on proper licensing for their livelihood.
Building Your Verification Workflow
Your best defense is a repeatable, robust process for checking every image. It’s less about finding one magical tool and more about developing a consistent habit.
Before you use any image, you need clear, confident answers to three fundamental questions:
- Who made this? The first step is always to identify the original photographer, illustrator, or creative agency. That’s your lead for finding legitimate usage info.
- What are the rules? You need to find the explicit terms—the license—that spells out how, where, and for how long you can use the image. "Free to download" does not mean "free to use."
- Is this even real? With the explosion of AI-generated content, an essential new step is verifying whether an image was created by a human or a machine. This can have its own set of usage implications.
To get started, here’s a quick look at the core methods this guide covers to help you build a reliable image checking process.
| Your Image Copyright Verification Workflow | | :--- | :--- | :--- | | Verification Method | What It Reveals | Best For | | Reverse Image Search | The image's online history, including original sources and other places it's been used. | Finding the earliest instance of an image to track down the creator or original publisher. | | Metadata & EXIF Data | Hidden details embedded in the file, like the creator's name, copyright notices, and camera settings. | Uncovering direct ownership information left by the photographer or a stock agency. | | License & Stock Site Check | The official usage terms and restrictions specified by a stock photo platform or creator. | Confirming the exact permissions for images found on platforms like Getty, Adobe Stock, or Unsplash. | | AI Image Detection | The probability that an image was generated by an AI model rather than a human. | Spotting synthetic media and understanding the new challenges of "creatorless" content. |
By combining these methods, you can move from uncertainty to confidence, ensuring every image you use is fully compliant.
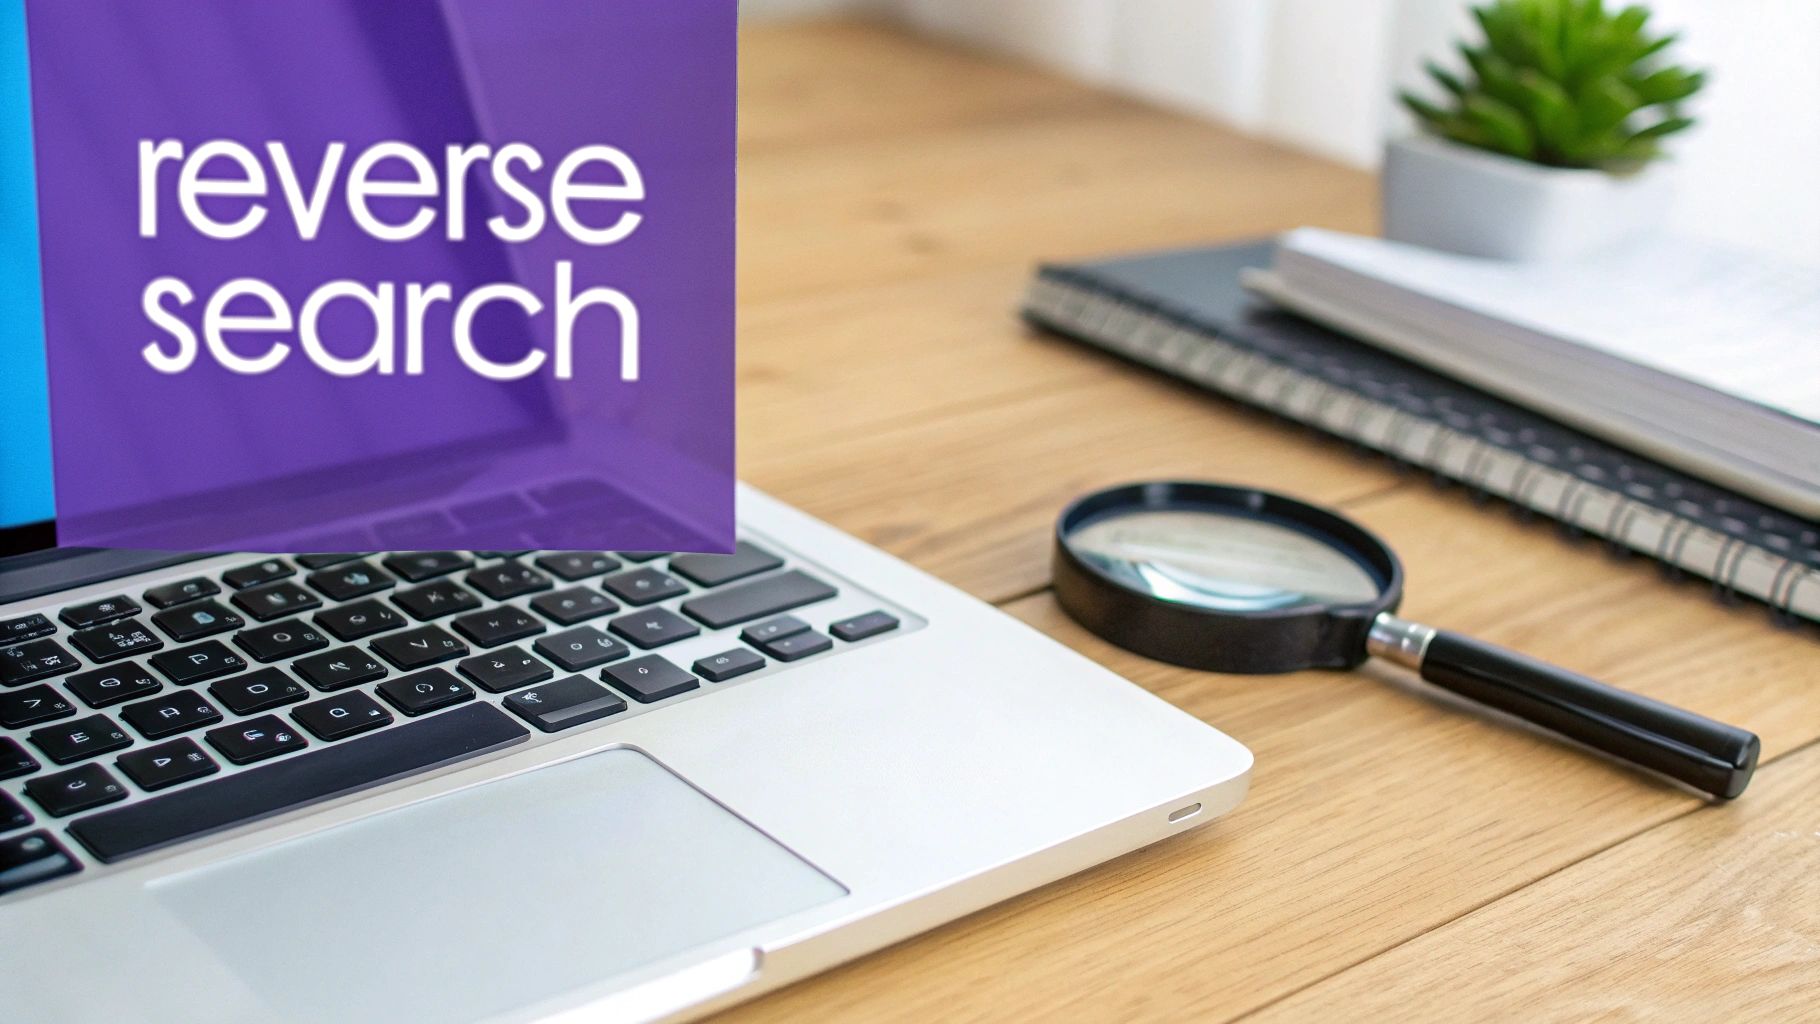
Getting Quick Answers with Reverse Image Search
When you need to check an image’s origin, your first move should almost always be a reverse image search. It's the fastest way to get an initial read. But don't just drop the image in and glance at the first result. If you learn how to use these tools effectively, you can often solve the copyright puzzle in minutes, saving yourself a ton of time.
Think of it like tracing an image’s digital breadcrumbs. A good search reveals where that image has been, how others are using it, and most importantly, where it first appeared. Your go-to tools are Google Images, TinEye, and Bing Visual Search, and I recommend trying all three, as each one often turns up slightly different results.
Digging Deeper Than Just an Exact Match
The real magic isn't always in finding a perfect duplicate. The most telling clues are often buried in the "visually similar images" section. I’ve seen cases where this uncovers an uncropped version of the same photo, suddenly revealing a watermark that someone had sliced off. That’s a huge red flag that you're dealing with a deliberately altered image.
Another trick I use all the time is adding keywords to the search. Let's say you have a photo of a team in an office. After you upload it, add search terms like "business meeting stock photo" or "corporate team Getty." This little step helps cut through the noise and can take you directly to the image’s page on a stock photo site, where all the licensing information is laid out for you.
A reverse image search is more than a matching game; it's about finding context. The goal is to follow the trail back to the image's very first appearance on the web, which is almost always the creator or the first legitimate publisher.
Following the Digital Trail
Once you have the results, it’s time to put on your detective hat. You need to analyze the information and figure out which source is the most legitimate.
- Hunt for High-Resolution Files: The original creator or agency will almost always have the highest quality version of the image. If you see a bunch of different sizes, the largest, crispest one is your best lead.
- Pay Attention to Dates: TinEye is fantastic for this because it lets you sort results by the oldest date. Finding the first time an image was indexed online often leads you straight to the photographer's portfolio or the original blog post where it debuted.
- Prioritize Authoritative Sources: An image that shows up on a professional photographer’s personal site or a major stock platform like Adobe Stock is a much more credible source than one pinned to a random Pinterest board. Always give more weight to these established sources.
This investigative process is also surprisingly effective for spotting potential AI-generated images. A complete lack of a digital history can be a major tell. To see how these same principles apply to synthetic media, check out our guide on AI reverse image search.
By treating a reverse image search as a diagnostic tool instead of a simple lookup, you can quickly distinguish a free-to-use image from a licensed one. You'll often find the creator and their terms of use without ever having to get into the weeds of metadata analysis, making it the most efficient first step in any copyright check.
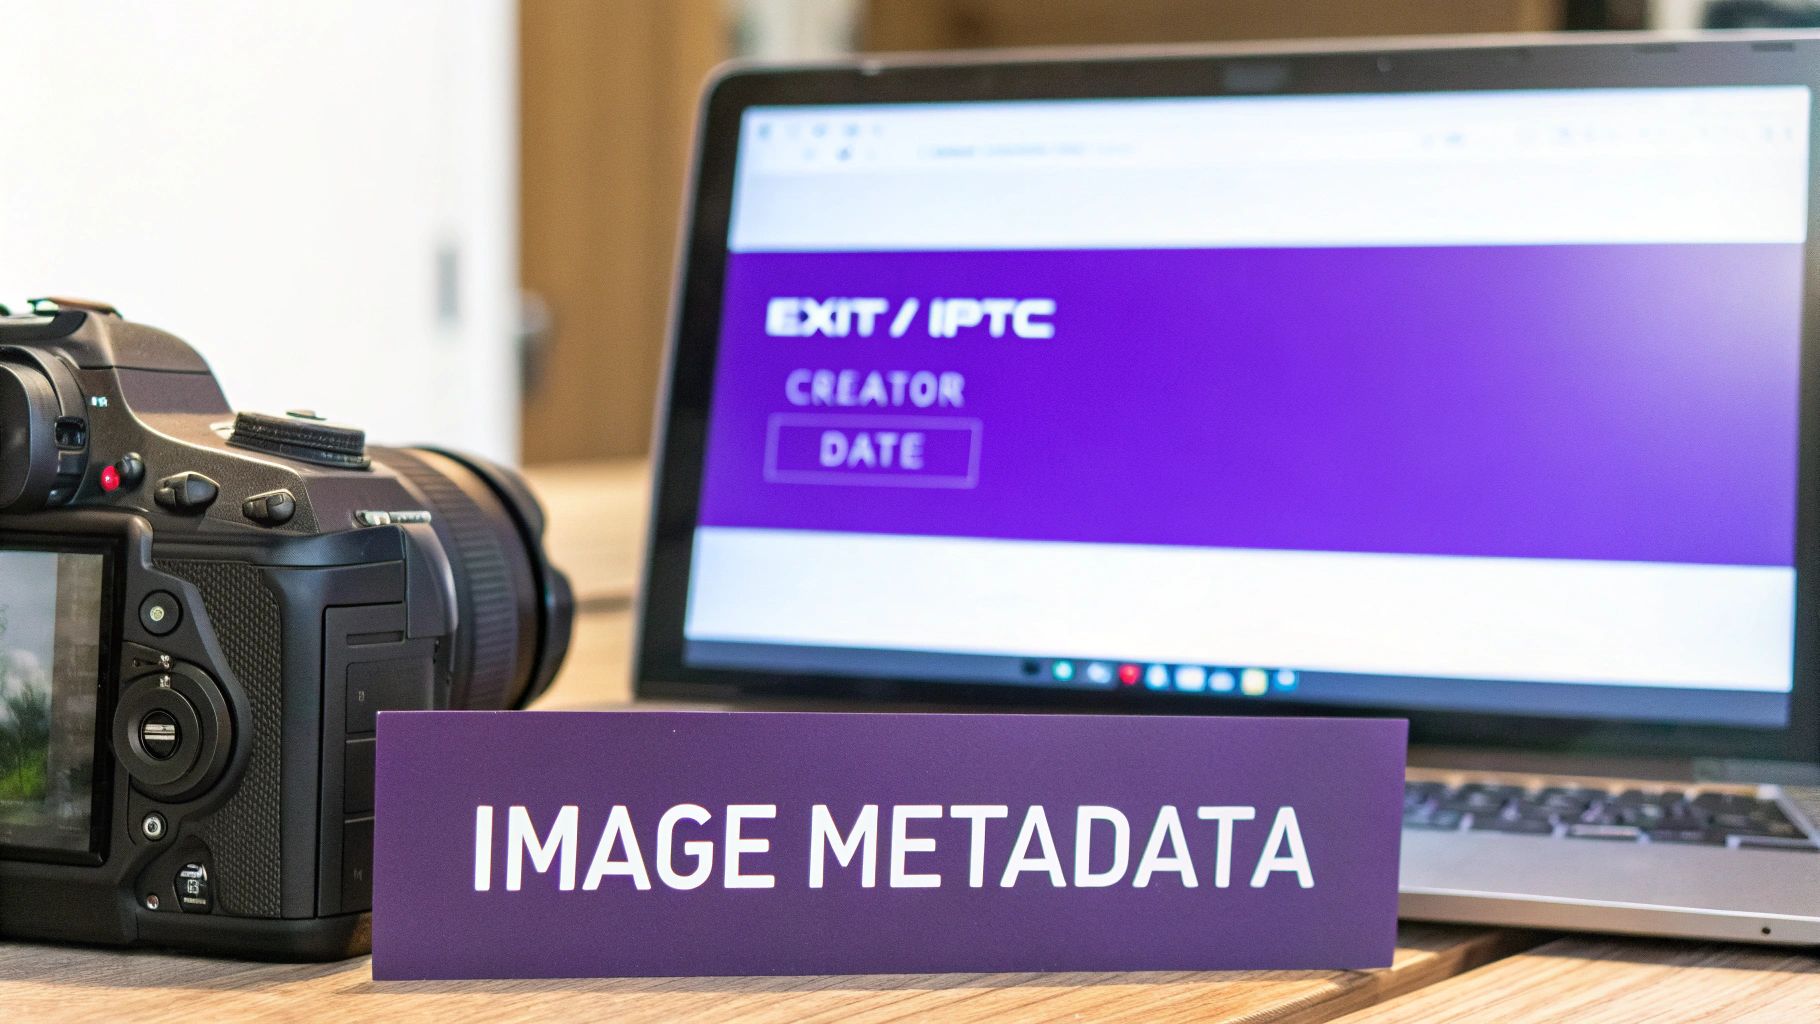
Uncovering Clues Hidden in Image Metadata
Once you’ve run a reverse image search, your next move is to look inside the image file itself. Think of it like a digital detective digging for fingerprints—this is where you’ll often find metadata, which is basically a set of data attached to the image file. It can be a goldmine of information, sometimes containing the creator’s name and explicit copyright notices right there in the file.
This info is usually stored in two common formats: EXIF (Exchangeable Image File Format) and IPTC (International Press Telecommunications Council). While EXIF data often contains technical camera details, the IPTC fields are where the real magic happens for copyright checks. This is where photographers, illustrators, and stock agencies manually add their ownership and contact details.
How to Access Image Metadata
The good news is you don't need any fancy software to get started. Your own computer can probably show you what you need to know in just a few clicks.
- On a Windows PC: Just right-click the image file, hit Properties, and then go to the Details tab. You'll see fields like "Author" and "Copyright" if they've been filled out.
- On a Mac: Open the image in the Preview app. Head up to the menu bar, click Tools, and then select Show Inspector. A small window will pop up; click the "i" icon, then look for the IPTC tab to see the copyright info.
If you're working with an image that's still online or just prefer a web-based tool, there are plenty of free metadata viewers out there. You can upload the image or paste its URL, and they'll give you a full report on all the data embedded within it.
A completely blank metadata section can be a pretty big red flag. While not every creator embeds this info, a high-quality, professional-looking photo with no data at all might mean it was deliberately stripped—a common tactic when images are stolen and reused.
What to Look For in Metadata
So, what are you actually looking for? You’re on the hunt for definitive proof of ownership. A well-tagged, professional image will make this easy for you.
For instance, the copyright field might say something crystal clear like, "© 2024 Jane Doe Photography. All Rights Reserved." That's a direct claim. You might also find "Jane Doe" in the "Author" or "Artist" field and maybe even a link to her website in a field like "Copyright Info URL."
This kind of information is the best lead you can get. It gives you a direct path to contact the rights holder and ask about licensing, turning your investigation from a guessing game into a straightforward inquiry. For a more detailed tutorial on this process, you can check image metadata with our step-by-step guide.
How to Confirm an Image's License and Source
So, your reverse image search or metadata digging pointed you to a potential source. That’s a solid start, but the real work begins now. To be certain you're in the clear, you absolutely have to confirm the image’s official license and make sure the source is legitimate. This is where you move from making an educated guess to having documented proof.
The tricky part? Not all sources are the same. You might find the same picture on a photographer's portfolio, a major stock photo site, and a dozen different blogs. Your mission is to trace it back to the definitive licensing authority.
This means you should cross-reference what you’ve found with major stock image databases like Getty Images, Adobe Stock, or Shutterstock, even if you didn't find the image there initially. A huge number of stolen images floating around the web are professional stock photos that have been lifted and reposted illegally.
Taking this verification step has never been more critical. With the flood of AI-generated content, the lines of authenticity and ownership are getting incredibly blurry. In fact, a recent survey found that 59% of people have seen AI-generated visuals in their news feeds. This makes a rock-solid copyright checking process essential for confirming a photo's true origin and creator.
Decoding Common License Types
Once you track down an image on a legitimate platform, you need to get familiar with its license. The legal jargon can feel a bit dense, but most licenses fall into a few main categories.
- Royalty-Free (RF): This is the one you’ll see most often. You pay a one-time fee to use the image in multiple projects without shelling out more cash for royalties. But it’s not a free-for-all; there are still rules. For instance, you typically can't resell the image as-is or use it as part of a logo.
- Rights-Managed (RM): Think of this as a more specific, restrictive license. It grants you permission for a single use based on a specific purpose, time frame, and even geographic location. Want to use it again for something else? You’ll need to buy a new license.
- Creative Commons (CC): This isn't just one license, but a whole family of them. They range from super permissive (use it for anything as long as you give credit) to much more restrictive (no commercial use, no modifications allowed). Always, always check the specific CC designation, like CC-BY or CC-BY-NC, to know the exact rules.
A critical piece of advice: Never assume "free to download" means "free to use." Even popular sites like Unsplash and Pexels have their own specific license terms you have to follow. And remember, there's always a chance someone uploaded an image to these platforms without the true creator’s permission.
Tracing Back to the Original Creator
Sometimes your detective work won't lead you to a big stock site. Instead, you might land on a photographer's personal website, their portfolio, or even a social media profile. This is often the best-case scenario because you've likely found the original source.
When this happens, hunt for a "licensing," "usage," or "contact" page on their site. Many professionals lay out their policies clearly. If you can't find anything, the best thing to do is simply reach out. A polite, direct email explaining how you'd like to use the image and asking about their licensing fees is the safest and most professional way to go.
That direct confirmation is your ultimate protection against any future infringement claims. The insights gained from a direct analysis of photos and a conversation with their creator are simply invaluable.
Navigating the New Frontier of AI-Generated Images
Everything we've discussed so far—reverse image searches, digging into metadata, tracking down licenses—operates on one core assumption: a human being created the image. But what if that’s not the case? This is the new reality every creator and publisher has to grapple with, and it's why checking for AI generation is no longer an optional step. It's essential.
Synthetic media throws a wrench into the works. These images often have no history, no EXIF data, and no creator to track down. They just exist, often looking so polished that you're tempted to use them without a second thought. This is precisely where an AI image detector becomes your most valuable player.
Why You Can't Afford to Skip the AI Check
The explosion of AI-generated content has created a legal gray area. The copyright status of synthetic images is still a massive question mark, with answers often buried deep in the terms of service of the generative AI model that made them. Using one without knowing its origin is a huge risk.
An AI image detector is trained to see what we can't. It scans a visual for the tell-tale digital fingerprints that generative models leave behind—things like unnatural textures, wonky lighting, or bizarre anatomical quirks in the background. These tools learn from millions of human- and AI-made pictures, giving them a knack for spotting patterns our eyes completely miss.
It's no surprise that the market for this technology is booming. The global AI image recognition sector is projected to more than double from USD 5.68 billion in 2026 to USD 11.07 billion by 2031. If you're curious about the drivers behind this growth, the full AI image recognition market intelligence report offers a deep dive.
Putting an AI Image Detector to the Test
Let's walk through a common scenario. You find a fantastic product shot on a clean background. It looks perfect for your e-commerce site, but your reverse image search turns up nothing, and the file is stripped of all metadata. Red flags should be waving. This is the perfect time to run an AI check.
Using a tool like AI Image Detector is incredibly simple. You just upload the file and let it work its magic.
The tool will give you a clear probability score, like the one you see above. A high score and a label like "Likely AI-Generated" is your answer. It tells you the image is almost certainly synthetic, and if you need something with a clear, human-owned copyright, you should steer clear.
The practical uses of AI in creating visuals are expanding every day, and for anyone in e-commerce, guides on AI product photography are becoming required reading.
A key takeaway: A high AI probability score doesn't automatically mean an image is "illegal." It means its copyright status is complicated and murky. For any business that needs to avoid legal risk, this is a clear signal to find an alternative image with a verifiable human creator and a straightforward license.
Adding an AI check to your process completes your modern copyright workflow. It’s your defense against the unknowns of synthetic media, ensuring every image you publish not only respects human creators but also safely navigates a world where machines can create art that looks just like ours.
Your Copyright Questions Answered
Even with a solid game plan, you're going to run into weird situations and tricky questions. It just happens. Below are some straight answers to the most common problems people face when trying to figure out where an image came from.
Think of this as practical advice for the real-world messes you'll actually encounter, not just a bunch of legal theory.
What if I Cannot Find the Original Source of an Image?
This is a classic dead end. You've run your reverse searches, scoured the metadata, and checked the databases, but you've come up with nothing. The answer here is simple, if a little frustrating: don't use the image.
Seriously. The potential legal headache and financial cost of a copyright claim just aren't worth it. Pivot to a reliable alternative, like finding a similar image on a reputable stock photo site or creating your own. When in doubt, always take the most cautious route. It will save you a lot of trouble down the line.
A great habit to get into is documenting your search. Just a quick note on the steps you took can be incredibly useful if someone ever questions your due diligence later on.
Is Giving Credit to the Photographer Enough?
In a word, no. While it’s a nice gesture, simply crediting the creator doesn't give you any legal right to use their work. Copyright law gives the owner exclusive control, and a simple credit line doesn't substitute for a proper license.
The only time attribution alone is acceptable is when the image is released under a specific Creative Commons license that explicitly allows it. You can't just assume. You have to find the license and follow its exact terms. To get a better handle on the rules, it's worth exploring the broader Intellectual Property law that governs all of this.
Where Does an AI Image Detector Fit in My Workflow?
Think of an AI image detector as your final, essential check. It's especially important for those slick, high-quality images that don't have a clear human source. After you've done your due diligence trying to find a human creator and a license, this tool can tell you if the image is synthetic.
This is a critical step. AI-generated images live in a legally murky area, often tied to the terms of service of the tool that made them. If authenticity is key to your work—maybe you're a journalist verifying a source or a brand protecting its reputation—an AI check is no longer optional. It’s how you close the loop on your investigation.


